
bible reading plan 2024 pdf
Category : PDF
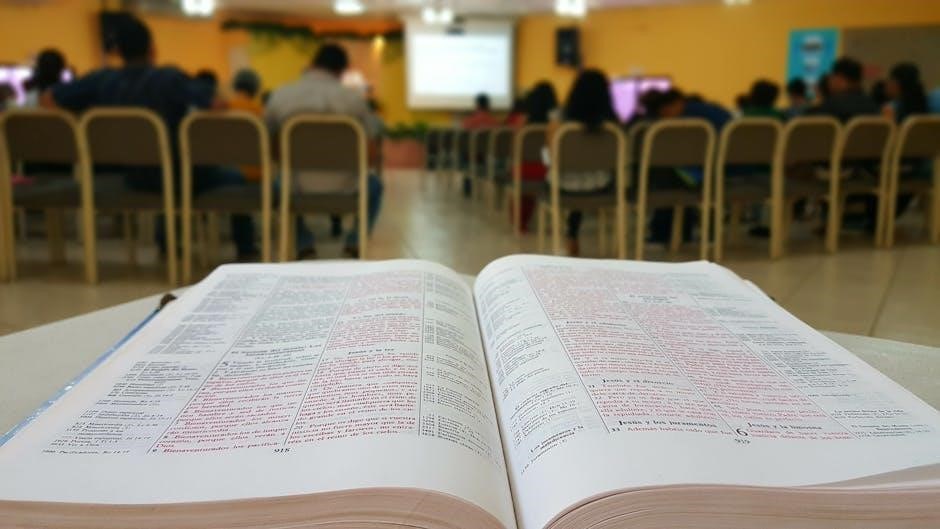
The 2024 Bible Reading Plan offers a structured approach to exploring Scripture‚ focusing on foundational books like Genesis and the Pentateuch․ Designed to deepen faith and foster community engagement‚ this plan provides daily readings and reflection sections‚ encouraging consistent spiritual growth throughout the year․ Perfect for personal or group study‚ it includes resources like devotionals and study guides to enhance understanding and application of God’s Word․
What is a Bible Reading Plan?
A Bible Reading Plan is a structured guide designed to help individuals or groups systematically read through the Bible․ It typically includes a daily or weekly schedule of specific passages‚ ensuring a steady progression through Scripture․ These plans vary in focus‚ offering options like reading the entire Bible‚ concentrating on specific genres‚ or exploring thematic connections․ Many plans‚ such as the 2024 Bible Reading Plan PDF‚ incorporate reflection and application sections to deepen understanding․ Whether for personal devotion or group study‚ a Bible reading plan provides a practical framework to engage with God’s Word intentionally and consistently‚ fostering spiritual growth and a deeper connection to Scripture․
Why Use a Bible Reading Plan in 2024?
Using a Bible Reading Plan in 2024 provides a structured path to engage deeply with Scripture‚ fostering consistent spiritual growth․ It helps build a daily reading habit‚ ensuring steady progress through the Bible while offering insights into its teachings․ By following a plan‚ individuals can explore the entire Bible‚ focus on specific genres‚ or delve into thematic connections‚ enhancing their understanding․ The 2024 Bible Reading Plan PDF includes resources like devotionals and study guides‚ making it easier to apply biblical truths practically․ Engaging with a plan also encourages community participation‚ creating opportunities for shared learning and accountability․ This structured approach ensures that the Word of God remains central to daily life‚ guiding believers toward a more meaningful and intentional faith journey throughout the year․

Structure of the 2024 Bible Reading Plan
The 2024 Bible Reading Plan is designed to guide readers through the entire Bible‚ with a focus on key books like Genesis‚ the Pentateuch‚ and others․ It includes daily structured readings‚ reflection sections‚ and resources to enhance understanding․ The plan is divided into manageable portions‚ ensuring steady progress while allowing for deeper engagement with specific genres or themes․ The accompanying PDF guide provides a clear schedule and supplementary materials‚ making it easy to follow and apply the teachings of Scripture throughout the year․
Overview of the Plan
The 2024 Bible Reading Plan is a comprehensive guide designed to help readers explore the entire Bible in a structured and meaningful way․ The plan emphasizes reading key books such as Genesis and the Pentateuch‚ which form the foundation of Scripture․ It includes daily readings‚ reflection sections‚ and supplementary resources like devotionals to enhance understanding․ The plan is organized to conclude by December 23‚ 2024‚ allowing time for catch-up or rest․ Whether for personal study or group engagement‚ the plan offers flexibility‚ enabling readers to focus on specific genres or testaments․ The accompanying PDF guide ensures convenience and accessibility‚ making it an ideal tool for deepening faith and fostering spiritual growth throughout the year․
Day-by-Day Reading Schedule
The 2024 Bible Reading Plan features a detailed day-by-day schedule‚ guiding readers through specific passages each day․ The plan begins with Genesis and progresses through key books like Exodus‚ Leviticus‚ Numbers‚ and Deuteronomy‚ forming the foundational Pentateuch․ Other sections include readings from Psalms‚ Proverbs‚ and the Prophets‚ ensuring a balanced exploration of both Old and New Testaments․ The schedule is designed to conclude by December 23‚ 2024‚ allowing a few days for reflection or catching up․ Each day’s reading is thoughtfully selected to maintain a logical flow‚ whether chronological or thematic‚ making it easier to follow and engage with Scripture consistently throughout the year․
Key Books of the Bible Covered
The 2024 Bible Reading Plan encompasses a wide range of Scripture‚ focusing on foundational books like Genesis and the entire Pentateuch‚ which provide a solid biblical framework․ Readers will explore key Old Testament texts such as Psalms‚ Proverbs‚ Jeremiah‚ Lamentations‚ Daniel‚ Hosea‚ Amos‚ Zechariah‚ and Malachi‚ offering insights into wisdom‚ prophecy‚ and history․ The plan also includes significant New Testament books‚ ensuring a balanced understanding of God’s redemptive story․ This comprehensive approach allows participants to engage deeply with both familiar and lesser-known passages‚ fostering a holistic grasp of Scripture and its relevance to daily life․ The selection is designed to illuminate the unity and diversity of the Bible’s message․

Resources and Supplements
The plan includes recommended devotionals like “For the Love of God” and additional study guides‚ all integrated to enhance your biblical understanding and application․

Recommended Devotionals for Accompaniment
To enhance your journey through the 2024 Bible Reading Plan‚ consider using devotionals like “For the Love of God”‚ which offers daily reflections on the passages you read․ This resource provides a deeper understanding of Scripture and encourages practical application․ Another option is “Be Thou My Vision”‚ a 31-day liturgy designed to complement your reading with prayer and worship․ Both resources are crafted to enrich your spiritual growth and foster a meaningful connection with God’s Word․ They are ideal for personal study or group discussions‚ ensuring a well-rounded and transformative experience throughout the year․
Additional Study Guides and Articles
Complement your 2024 Bible Reading Plan with a curated collection of study guides and articles designed to deepen your understanding of Scripture․ These resources are thoughtfully integrated throughout the plan‚ offering insights into specific themes‚ historical contexts‚ and theological concepts․ Hyperlinked within the plan‚ they provide opportunities to explore topics further‚ such as the symbolism in Genesis or the historical background of the Pentateuch․ These guides are perfect for those seeking to enrich their study‚ whether for personal reflection or group discussions․ They are conveniently accessible online‚ ensuring easy navigation and enhancing your journey through God’s Word in 2024․
Reflection and Prayer Prompts
The 2024 Bible Reading Plan includes thought-provoking reflection and prayer prompts to help you apply Scripture to your life․ These prompts encourage personal meditation‚ gratitude‚ and prayer‚ guiding you to connect with God’s Word deeply․ Each day’s reading is paired with questions to spark spiritual growth and foster a meaningful prayer life․ Additionally‚ there are suggestions for praising God’s character and confessing sins‚ helping you align your heart with His will․ These prompts are designed to make your Bible reading experience more intentional and transformative‚ allowing you to grow closer to God throughout the year․ They are seamlessly integrated into the plan’s PDF format for easy access and daily encouragement․

Benefits of Following the Plan
Fulfilling the 2024 Bible Reading Plan enriches your faith journey by deepening understanding‚ fostering consistent habits‚ and encouraging community connection‚ leading to meaningful spiritual growth and transformation․
Deepening Faith and Understanding
The 2024 Bible Reading Plan is designed to deepen your connection with Scripture‚ offering a comprehensive approach to understanding God’s Word․ By systematically reading through foundational books like Genesis and the Pentateuch‚ you’ll gain insights into the biblical narrative that shapes faith․ Daily readings and reflection sections encourage the application of spiritual truths‚ fostering a deeper grasp of God’s character and promises․ Supplementary resources‚ such as devotionals and study guides‚ further enrich your journey‚ helping you explore complex themes and genres․ This structured plan not only enhances your knowledge of the Bible but also strengthens your ability to apply its teachings in everyday life‚ leading to a more profound and personal faith experience․
Building a Daily Reading Habit
Consistency is key to spiritual growth‚ and the 2024 Bible Reading Plan is designed to help you establish a daily reading habit․ With structured readings and reflection sections‚ the plan encourages regular engagement with Scripture․ By dedicating a few minutes each day to read and reflect‚ you’ll cultivate a routine that fosters deeper connection with God’s Word․ The plan’s clear schedule and accessible format make it easier to stay on track‚ even for those with busy lifestyles․ Supplementary resources like devotionals and prayer prompts further support consistency‚ helping you maintain momentum and transform Bible reading into a lifelong habit․
Community Engagement and Group Study
The 2024 Bible Reading Plan fosters community engagement by encouraging group study and shared reflection․ Reading alongside others creates accountability and deeper understanding‚ as participants can discuss insights and challenges․ The plan’s structured schedule allows groups to stay aligned‚ whether studying in person or virtually․ Additional resources like devotionals and liturgies‚ such as For the Love of God and Be Thou My Vision‚ provide rich material for collective exploration․ This communal approach not only enriches individual study but also strengthens bonds within the church or study group‚ making the journey through Scripture a shared and transformative experience for all involved․

Popular Bible Reading Plans for 2024
The One Story Plan by BibleProject and the Whole Bible Plan are top choices‚ offering structured daily readings․ Additionally‚ options to focus solely on the Old or New Testament provide flexibility for deeper study‚ ensuring a personalized journey through Scripture in 2024․
The One Story Plan by BibleProject
The One Story Plan by BibleProject is a comprehensive 2024 Bible Reading Plan designed to guide readers through the entire Bible in a single narrative flow․ This plan emphasizes the interconnectedness of Scripture‚ revealing how every book points to Jesus․ It includes daily readings with corresponding dates‚ ensuring participants stay on track throughout the year․ The plan concludes on December 23‚ 2024‚ allowing a few days for reflection or catching up․ Ideal for both individual and group study‚ this plan is part of a broader church-wide initiative to foster deeper engagement with God’s Word․ Its structured approach and thematic focus make it a popular choice for those seeking a meaningful spiritual journey in 2024․
The Whole Bible Plan
The Whole Bible Plan is an ambitious yet rewarding option for those committed to reading the entire Scripture in 2024․ This plan guides readers through both the Old and New Testaments‚ ensuring a comprehensive understanding of God’s story․ It is structured to be completed within the year‚ with daily readings carefully scheduled to cover every book of the Bible․ Participants can choose to read the full Bible or focus solely on the Old or New Testament‚ offering flexibility based on personal preference․ This plan is ideal for individuals or churches seeking to immerse themselves in the entirety of God’s Word‚ fostering a deeper connection with the divine narrative and its timeless truths․
Old and New Testament Options
The 2024 Bible Reading Plan offers flexibility with options to focus on the Old Testament‚ New Testament‚ or both․ Reading the entire Bible provides a comprehensive view‚ while focusing on one testament allows for deeper exploration․ The Old Testament option highlights foundational stories‚ laws‚ and prophecies‚ while the New Testament delves into the life of Jesus‚ the early church‚ and epistles․ This flexibility accommodates different reading preferences and spiritual goals‚ ensuring everyone can engage meaningfully․ Whether you prefer a broad overview or an in-depth study‚ these options make the plan adaptable to your needs‚ fostering a personalized journey through Scripture․
Key Features of the 2024 Bible Reading Plan PDF
The 2024 Bible Reading Plan PDF offers daily structured readings‚ reflection sections‚ and accessible formats‚ ensuring convenience for personal or group study year-round․

Daily Structured Readings
The 2024 Bible Reading Plan PDF provides a clear‚ day-by-day schedule with specific passages to guide readers through the Bible systematically․ Each day’s reading is carefully selected to balance Old and New Testament texts‚ ensuring a holistic understanding of Scripture․ The plan includes a mix of narrative‚ poetry‚ prophecy‚ and teachings‚ keeping the content engaging and varied․ By following the structured readings‚ participants can track their progress easily‚ staying consistent and motivated throughout the year․ This daily approach fosters a routine of spiritual discipline‚ helping readers connect deeply with God’s Word and apply its truths to their lives․ The plan’s design ensures that even the busiest individuals can participate meaningfully․
Reflection and Application Sections
The 2024 Bible Reading Plan PDF incorporates reflection and application sections to help readers deepen their faith and connect Scripture to daily life․ These sections provide thought-provoking questions and prompts‚ encouraging users to meditate on key verses and consider how biblical truths apply to their personal circumstances․ Reflection questions are designed to spark spiritual growth‚ while application prompts guide readers in putting God’s Word into practice; This feature makes the plan more than just a reading schedule—it becomes a tool for transformative spiritual engagement․ By combining reflection and application‚ the plan helps participants move beyond mere knowledge of Scripture to a lived-out faith that impacts every area of life․ This intentional focus fosters a deeper‚ more meaningful relationship with God․
Accessibility and Convenience
The 2024 Bible Reading Plan PDF is designed for accessibility and convenience‚ ensuring everyone can engage with Scripture effortlessly․ The PDF format allows for easy downloading and sharing across devices‚ making it accessible on both mobile and desktop platforms․ The plan’s structured daily readings provide a clear schedule‚ eliminating the need to manually track progress․ This convenience ensures consistency and makes it simple for individuals or groups to stay on track throughout the year․ Additionally‚ the PDF’s portability enables users to access their reading plan anywhere‚ fostering a seamless and uninterrupted spiritual journey․ This accessibility feature makes the plan an ideal resource for modern discipleship and spiritual growth․

Customization Options
The 2024 Bible Reading Plan PDF offers flexibility to adjust reading pace and focus on specific genres or incorporate liturgy and prayer‚ catering to diverse preferences and study goals․
Adjusting the Reading Pace
The 2024 Bible Reading Plan PDF allows users to customize their reading pace‚ ensuring a comfortable and manageable schedule․ Whether you prefer a slower‚ in-depth approach or a faster overview‚ the plan accommodates different learning styles․ This flexibility is particularly useful for those balancing busy schedules or seeking to delve deeper into specific passages․ By adjusting the reading pace‚ individuals can maintain consistency while exploring the Bible’s richness without feeling overwhelmed․ This adaptability makes the plan accessible to both new and seasoned readers‚ fostering a personalized and enriching spiritual journey throughout the year․
Focusing on Specific Genres
The 2024 Bible Reading Plan PDF offers the flexibility to focus on specific genres‚ allowing readers to dive deeper into areas of interest․ For example‚ users can concentrate on wisdom literature‚ prophetic books‚ or epistles‚ tailoring their study to align with personal spiritual goals․ This feature is particularly beneficial for those seeking to explore thematic connections or gain a richer understanding of certain biblical themes․ By focusing on specific genres‚ readers can engage more meaningfully with the text‚ fostering a more immersive and targeted study experience throughout the year․ This customization option enhances the plan’s versatility‚ making it suitable for diverse learning preferences and spiritual journeys․
Incorporating Liturgy and Prayer
The 2024 Bible Reading Plan PDF seamlessly integrates liturgy and prayer to enhance the spiritual experience․ Users can complement their daily readings with resources like For the Love of God‚ a daily devotional‚ or Be Thou My Vision‚ a 31-day liturgical guide․ These tools encourage reflection and deeper engagement with Scripture․ By incorporating prayer prompts and liturgical elements‚ the plan fosters a meaningful connection with God’s Word․ This approach allows readers to not only read but also pray through the Bible‚ creating a holistic practice that enriches faith and encourages consistent spiritual growth throughout the year․ Liturgy and prayer become integral parts of the journey‚ making the study more immersive and personally transformative․

Accessibility and Digital Formats
The 2024 Bible Reading Plan PDF is designed for easy access across devices․ Compatible with both mobile and desktop‚ it ensures a seamless reading experience anywhere‚ anytime‚ making Scripture study convenient and flexible for everyone․
Downloading the PDF Guide
Downloading the 2024 Bible Reading Plan PDF is a straightforward process‚ ensuring quick and easy access to your daily readings․ The guide is available for free‚ offering a comprehensive yet organized structure to your Bible study․ Once downloaded‚ you can save it on your device or print it for personal use․ The PDF format ensures that the content is accessible on both mobile and desktop platforms‚ providing flexibility for your reading routine․ This convenient setup allows you to stay on track with your spiritual journey‚ whether you’re reading alone or with a group․ Make sure to download your copy today and start your journey through the Scriptures with clarity and ease․
Mobile and Desktop Compatibility
The 2024 Bible Reading Plan PDF is designed to be fully compatible with both mobile and desktop devices‚ ensuring seamless accessibility wherever you are․ The PDF format is optimized for readability on smaller screens‚ allowing you to easily navigate through daily readings and reflection sections․ Whether you prefer to read on your phone during commutes or on your desktop at home‚ the plan adapts flawlessly to your device․ This cross-platform compatibility makes it simple to stay consistent with your Bible study‚ even with a busy schedule․ The clear layout and zoom functionality ensure that the text remains legible on any screen size‚ providing a comfortable reading experience for everyone․ This feature enhances the overall convenience of the plan‚ making it a practical tool for daily devotionals․
Sharing with Groups or Congregations
The 2024 Bible Reading Plan PDF is easily shareable‚ making it a valuable resource for groups or congregations․ Churches and small groups can distribute the guide to members‚ fostering unity as everyone follows the same structured readings․ The plan includes recommendations for group-friendly devotionals‚ such as For the Love of God and Be Thou My Vision‚ which can enhance collective study․ Additionally‚ the PDF’s hyperlinked resources provide opportunities for deeper exploration of themes and books‚ encouraging group discussions and shared learning․ Sharing the plan promotes accountability and communal spiritual growth‚ helping participants stay connected and engaged throughout the year․ This feature makes it an ideal tool for churches and ministries seeking to strengthen their community’s faith journey together․
The 2024 Bible Reading Plan PDF concludes with encouragement for consistent reading‚ emphasizing spiritual growth and deeper connection with God’s Word․ It provides a comprehensive guide to navigate Scripture thoughtfully‚ ensuring a transformative journey through the Bible in 2024․
Final Thoughts on the 2024 Plan
The 2024 Bible Reading Plan is a thoughtfully designed guide to help individuals and communities engage deeply with Scripture․ By focusing on key books such as Genesis and the Pentateuch‚ the plan provides a solid foundation for understanding the Bible’s overarching narrative․ The inclusion of daily structured readings and reflection sections encourages consistent engagement and application of God’s Word․ This plan is not just about reading; it’s about transforming lives through a meaningful connection with Scripture․ Embrace the journey‚ stay committed‚ and allow the Word of God to shape your spiritual growth in 2024 and beyond․
Encouragement for Consistent Reading
Consistency is key to fully benefiting from the 2024 Bible Reading Plan․ By dedicating time each day to engage with Scripture‚ you’ll build a lasting habit that nurtures spiritual growth․ The structured format and reflection sections are designed to keep you on track‚ even when life gets busy․ Remember‚ the goal isn’t perfection but progress․ Celebrate small victories‚ like completing a week’s readings‚ and lean on the community for support․ The plan’s resources‚ such as devotionals and study guides‚ are here to inspire and guide you․ Stay committed‚ and let God’s Word transform your life in meaningful ways throughout 2024․
Looking Ahead to Spiritual Growth
The 2024 Bible Reading Plan is a powerful tool for fostering spiritual growth․ By engaging with Scripture daily‚ you’ll deepen your understanding of God’s Word and its relevance to your life․ The plan’s structured approach ensures a comprehensive journey through key books‚ from Genesis to the New Testament‚ helping you see the big picture of God’s story; As you explore different genres and themes‚ you’ll gain insights that enrich your faith․ The goal is not just to read but to apply what you learn‚ allowing Scripture to transform your heart and mind․ Commit to this plan‚ and anticipate a year of meaningful spiritual development and a stronger connection with God․